

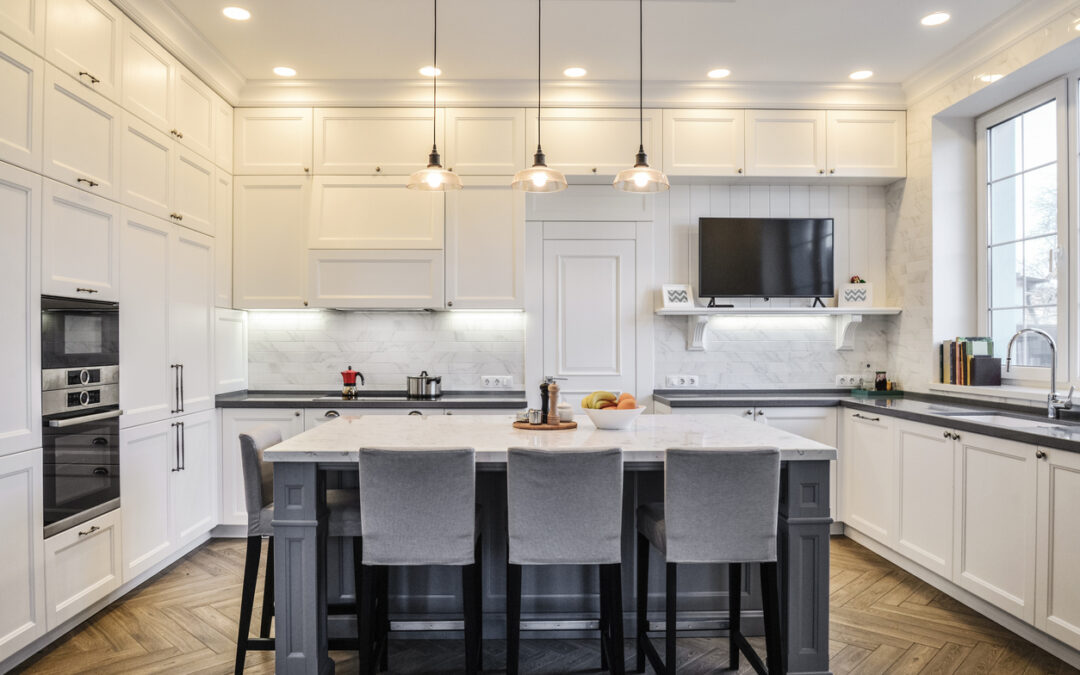
When planning a kitchen renovation, homeowners often dedicate most of their design focus to high-visibility finishes like custom quartz countertops, bespoke cabinetry, or statement tile backsplashes. However, even the most beautiful materials will fall flat if they are left in the dark—or worse, obscured by harsh, misplaced shadows.
A single central dome fixture or an uncalculated array of ceiling lights can ruin the functionality of an upscale kitchen. To create a workspace that feels warm, expansive, and highly operational, you need to rely on a precise layout strategy.
Learning where to place recessed lighting in a kitchen remodel requires calculating exact distance boundaries, targeting active counter zones, and avoiding common structural design errors.
The Core Strategy: Focus on the Counters, Not the Floors
The single most common mistake homeowners make when installing recessed cans is mapping out a symmetrical grid pattern based purely on the empty floor space of the room. This approach results in light fixtures being positioned over open walkways, casting illumination onto the top of the cook’s head and creating a heavy shadow right over the cutting board or stove.
To prevent this, shift your layout geometry to focus on task surfaces:
1. The 24-Inch Alignment Rule
Standard kitchen base cabinets have a depth of 24 inches. To illuminate your workspace perfectly without throwing your own shadow onto the surface, your recessed lighting housings should be centered exactly 24 inches out from the wall.
- Why it works: Aligning the center of the light canister directly with the front edge of your countertops ensures the beam washes down over your prep stations, sinks, and range areas cleanly.
2. Spacing Based on Ceiling Height
The physical distance between your individual light fixtures is dictated directly by your vertical clearance. A reliable industry rule of thumb is to divide your ceiling height by two:
- 8-Foot Ceilings: Space your recessed canisters roughly 4 feet apart.
- 9-to-10-Foot Ceilings: You can expand your spacing parameters to roughly 4.5 to 5 feet apart, using slightly higher-output LED trims or adjusting beam spreads to ensure overlapping light cones.
Avoiding the “Swiss Cheese Ceiling”
While plenty of illumination is essential in a workspace, drilling dozens of arbitrary holes into your drywall will lead to a cluttered aesthetic, often referred to as a “Swiss Cheese ceiling.”
The secret to luxury interior design isn’t adding more light fixtures—it’s layering different fixture types. Recessed lighting should act strictly as your ambient and task baseline, meaning it should be paired strategically with other structural illumination:
- Under-Cabinet LED Strips: Take the heavy lifting off your ceiling fixtures by adding dedicated under-cabinet tape lights. These completely erase shadows on your perimeter counters.
- Island Pendant Features: Reserve the space directly over a custom kitchen island for decorative architectural pendants or statement chandeliers rather than flat recessed housings. This introduces a focal point and grounds the entire room.
Hidden Conflict Zones to Map Before You Cut
Before your electrical team begins routing wires and cutting drywall, cross-reference your lighting blueprint against your final cabinetry and appliance layouts to avoid these common physical conflicts:
- The Cabinet Door Swing: Ensure that your recessed cans are recessed far enough from upper wall units that crown molding details or wide-swinging cabinet doors do not clip or block the physical path of the light cone when opened.
- Ceiling Joist Real Estate: Have your contractor map your ceiling joists using a deep-scanning stud finder early. Finding a structural support beam running exactly where you intended to place a center light will force layout modifications. If space is tight, look into modern ultra-thin, canisterless LED wafers that clip directly into drywall without requiring a deep structural housing.
- The Vent Hood Shadow: Large, professional-grade stainless steel range hoods extend out over cooktops significantly. Ensure your ceiling cans are spaced far enough to the left and right of the hood assembly so it doesn’t block light from reaching the back burners.
Engineering a Flawless Layout Flow
Achieving a high-end, balanced kitchen remodel requires a balance of mechanical calculations, architectural insight, and premium craftsmanship. From maximizing spatial footprints to establishing stunning lighting profiles, every subtle calculation determines how comfortable your home sanctuary feels.
At CT Shower & Bath, we guide Connecticut homeowners through comprehensive, design-forward home updates with precision project tracking and expert field execution. Whether you are executing a premium kitchen remodeling overhaul or want to explore layout design flow, our dedicated team is here to bring your home vision to life with zero subcontractors.
Ready to see how precision spacing transforms a room? Tour our recent residential work in our kitchen remodeling gallery and learn more about our comprehensive design and implementation process.
Contact our West Hartford design team today at 860-236-6500 to schedule your free, in-home layout and lighting consultation!